Showing posts with label exterior layer. Show all posts
Showing posts with label exterior layer. Show all posts
Monday, January 6, 2014
Saturday, December 21, 2013
View C part 3
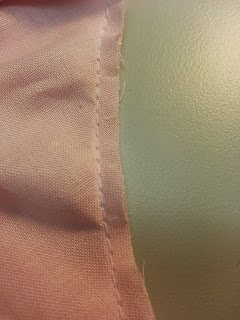
Exterior Layer
The exterior layer is constructed the same as the interior layer of View B. The only exception being that you will have the shirring channel side visible.
Compare the difference between View B and View C:


The only difference is that View C's shirring is on the right side, and View B's is on the wrong side.
All the construction is the same. Applying to the buckram form is the same except that you will apply it to the exterior in View C and the Interior in View B.
I am including construction pictures.


This concludes the Tutorials for the "Dinah" Bonnet pattern. I hope that if you have any questions you will message me, or ask them here on the blog. I have faith that you will finish the bonnets and give me honest and thorough feedback. I'm counting on you guys! :) Thanks again for agreeing to participate in this project! :)
Compare the difference between View B and View C:

View B

View C
The only difference is that View C's shirring is on the right side, and View B's is on the wrong side.
All the construction is the same. Applying to the buckram form is the same except that you will apply it to the exterior in View C and the Interior in View B.
I am including construction pictures.


As in View B you will use a whip stitch to attach the exterior layer to the buckram form.
Apply Interior Layer to Buckram Form
Next as in View B you will use a slip stitch to apply the interior layer. I'm including my construction pictures.


Saturday, December 7, 2013
View B Part 3
At this point you should have the exterior layer constructed and set aside, as well as the interior layer constructed and whip stitched to the buckram form.


Attach Exterior Layer to Buckram Form
Fold seam allowances to wrong side, match centers and pin Exterior layer to the buckram form.


Once the Exterior layeris pinned to the buckram form, use a slip stitch to hand sew it to the buckram form.


The concludes the tutorial for View 3.
You may notice that I'm not including trimming the bonnet, this is because I'm not looking for exact duplicates. I trust you to trim your bonnet however you see fit. Just for your reference, the View B's example that I made is trimmed with a large embroidered net lace collar that I ordered from China on Ebay. It was $10. I guess what I'm saying is, find pretty things for your bonnet and trim away.
You may notice that I'm not including trimming the bonnet, this is because I'm not looking for exact duplicates. I trust you to trim your bonnet however you see fit. Just for your reference, the View B's example that I made is trimmed with a large embroidered net lace collar that I ordered from China on Ebay. It was $10. I guess what I'm saying is, find pretty things for your bonnet and trim away.
Friday, December 6, 2013
View B part 1

View B
A simple exterior,A Shirred interior,
A ruffle along the outside edge
Cutting for Exterior:
Cut 1 simple brim on Bias with 1/2 inch seam allowance includedCut 1 Crown on Bias with 1/2 inch seam allowance included

Exterior Application:
Mark X's and Centers on both brim and crown. Sew between X's in Brim/Crown seam. DO NOT sew to fabrics edge.


Notch seam allowances between X's and trim.

With a water soluable pen mark X's on right side of fabric.

Using a 1/2" seam allowance apply ruffle or lace to the entire oustide edge of Brim and Crown. When you get to X's in Brim and Crown seam, sink your needle into X and pivot, making sure not to catch seam allowances.


Using a 1/2" seam allowance apply ruffle or lace to the entire oustide edge of Brim and Crown. When you get to X's in Brim and Crown seam, sink your needle into X and pivot, making sure not to catch seam allowances.


When completed with Exertior cover, set asside.
Wednesday, November 20, 2013
View A Part 1
View A is a simple exterior, a simple interior with lace or ruffle decorations and a bias binding.


You will find though that because the bonnet is curved you will most likely need to pull out the outside stitches (stitches along the binding edge) that hold the 2 layers together, because they will tend to bubble. You will only know if you need to do this once you try to apply the fabric to the buckram form.


This example bonnet is covered 100% Kona Cotton and Flocked Poly Organza.
External Layer
I cut a Brim and a Crown piece from both the Kona Cotton and the Flocked Organza. I used a technique known as "flat lining" to cover the external layer. Basically flat lining means to treat 2 layers of fabric as 1.
Here is a great tutorial on doing flat lining:
http://thedreamstress.com/2013/10/tutorial-how-to-sew-flat-lining/You will find though that because the bonnet is curved you will most likely need to pull out the outside stitches (stitches along the binding edge) that hold the 2 layers together, because they will tend to bubble. You will only know if you need to do this once you try to apply the fabric to the buckram form.


Once all is cut, seam the crown to brim between marks provided. Once seamed you need to notch and trim seam. Notch close to seam but don't cut threads, trim seam allowance to 1/4 of an inch. Press seam back toward crown. Use a tailors ham or sleeve board to make seam flat.


Obviously, make sure you mark your centers, both on the crown and the brim. Match up all centers to centers on buckram form. You can hand sew or machine sew along the outside edge to attach the external cover to the buckram form. You will be sewing through the buckram form. For some reason I didn't take a picture of this step.
Next blog post will be the internal layer and the binding.
Subscribe to:
Posts (Atom)