Showing posts with label view A. Show all posts
Showing posts with label view A. Show all posts
Monday, January 6, 2014
Thursday, November 21, 2013
View A Part 3
Bias Binding
This tutorial is done in the prospective of hand sewing. You can of course do this on the machine, but you may not have as nice of results.
You will need approximately 2 yards of bias tape. You can either use the video tutorial from my blog to make your own bias tape, or you can use pre made bias tape.
If you are using your own bias tape, you will need to pre fold one side at 1/2 an inch. Like I say in the video, the bonnet will be thick, and it's hard to accurately predict how wide the bias tape will need to be to have an accurate 1/2 an inch of bias tape on either side of the bonnet. That being said, if you pre fold the exterior side at 1/2 an inch (that being the side that is most offten seen) and by eye, fold the interior side as close as possible to 1/2 an inch, you will get a more pleasing result.
I use a metal pressing ruler to do this.


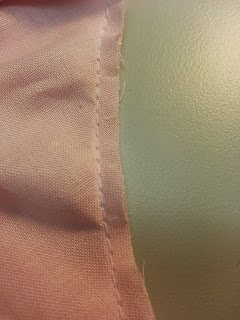
You will apply bias tape with a staggered back-stitch. The difference between back-stitch and a staggered back-stitch is instead of starting your next stitch at the base of the last stitch, begin your stitch halfway between your new stitch and your last....thus staggered.
 Your needles grab should be about 1/4 of an inch, the finished stitch will be half that length about 1/8 of an inch.
The most difficult areas to apply will be the corners. There are 4 outside corners and 2 inside corners.

The most difficult areas to apply will be the corners. There are 4 outside corners and 2 inside corners.
Outside Corners
You will be applying the bias tape to the bonnets exterior to start with.
Put a Running Stitch through the area of bias tape that will be applied to the bonnets outside corner. Pull the thread taught and arrange the bias tape to the outside corner so that the fabric is smooth. Again, use the staggered back-stitch to sew the bias tape to the bonnet.


Inside Corner
You will start the inside corner by placing the bias binding along one side of the corner. Measure 1/2 an inch to the interior and 1/2 an inch from the bias edge. You should have a perfect 45 degree angle from the bonnets inside corner edge.

Stagger back-stitch back to your last completed outside corner.
Now make a 45 degree fold in the bias tape and line up the bias tape to the bonnets edge. Starting at the inside corner, made sure that there are no folds in the bias tape, start your staggered back-stitches and work onward to the next outside corner.
Interior Bias Binding.
Once the exterior binding is finished , roll the bias tape over the bonnets edge and fold the bias tape leaving 1/2 of an inch bias tape on the interior side.
Pin and fold all the bias tape on the interior side. Smooth as you, go, create small pleats at outside corners, and make a 45 degree fold at the inside corners.
You will use a slip stitch to attach the bias binding on the interior.

That concludes the View A tutorial.
View A Part 2
Interior Layer
The interior layer of View A is a simple Brim with ruffle/lace trim.
You will need to cut 1 of each Brim and Crown. These are both cut on the bias. Once cut out, using your prefered method, mark the placement lines for the ruffle/lace trim. The pattern is marked for 1 inch trim. I have made my own trim using 1 inch strips of flocked poly organza. It has been given rolled hems on both raw edges and then gathered. This isn't necessary, you can use store bought trim.

Sew the trim down row by row, starting with the outmost row and working inward toward the crown/brim seam. The last piece of ruffled trim will actually be placed in the crown/brim seam.

Remove the excess trim to make the brims edges more apparent.

Now, matching centers, seam the brim to crown.

As Exterior layer, notch and trim Brim/Crown seam.


Now matching center lines, apply internal layer to buckram form.


It's completely possible to apply the layers to buckram by hand. You can just use a whip stitch and puncture through from interior layer to exterior layer and whip your sewing thread around outside wired edge to puncture interior layer again.
Also, if you are using a home machine, please use a heavy needle, and be careful at the brim/crown seam. There are 2 lines of wire at that point.
Next we will do the bias binding tutorial.
Wednesday, November 20, 2013
View A Part 1
View A is a simple exterior, a simple interior with lace or ruffle decorations and a bias binding.


You will find though that because the bonnet is curved you will most likely need to pull out the outside stitches (stitches along the binding edge) that hold the 2 layers together, because they will tend to bubble. You will only know if you need to do this once you try to apply the fabric to the buckram form.


This example bonnet is covered 100% Kona Cotton and Flocked Poly Organza.
External Layer
I cut a Brim and a Crown piece from both the Kona Cotton and the Flocked Organza. I used a technique known as "flat lining" to cover the external layer. Basically flat lining means to treat 2 layers of fabric as 1.
Here is a great tutorial on doing flat lining:
http://thedreamstress.com/2013/10/tutorial-how-to-sew-flat-lining/You will find though that because the bonnet is curved you will most likely need to pull out the outside stitches (stitches along the binding edge) that hold the 2 layers together, because they will tend to bubble. You will only know if you need to do this once you try to apply the fabric to the buckram form.


Once all is cut, seam the crown to brim between marks provided. Once seamed you need to notch and trim seam. Notch close to seam but don't cut threads, trim seam allowance to 1/4 of an inch. Press seam back toward crown. Use a tailors ham or sleeve board to make seam flat.


Obviously, make sure you mark your centers, both on the crown and the brim. Match up all centers to centers on buckram form. You can hand sew or machine sew along the outside edge to attach the external cover to the buckram form. You will be sewing through the buckram form. For some reason I didn't take a picture of this step.
Next blog post will be the internal layer and the binding.
Tuesday, November 19, 2013
Subscribe to:
Posts (Atom)