Thursday, November 21, 2013

View A Part 3

Bias Binding

This tutorial is done in the prospective of hand sewing. You can of course do this on the machine, but you may not have as nice of results.

You will need approximately 2 yards of bias tape. You can either use the video tutorial from my blog to make your own bias tape, or you can use pre made bias tape.

If you are using your own bias tape, you will need to pre fold one side at 1/2 an inch. Like I say in the video, the bonnet will be thick, and it's hard to accurately predict how wide the bias tape will need to be to have an accurate 1/2 an inch of bias tape on either side of the bonnet. That being said, if you pre fold the exterior side at 1/2 an inch (that being the side that is most offten seen) and by eye, fold the interior side as close as possible to 1/2 an inch, you will get a more pleasing result.

I use a metal pressing ruler to do this.


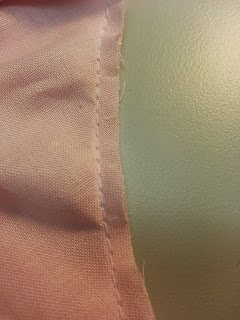
You will apply bias tape with a staggered back-stitch. The  difference between back-stitch and a staggered back-stitch is instead of starting your next stitch at the base of the last stitch, begin your stitch halfway between your new stitch and your last....thus staggered.

 Your needles grab should be about 1/4 of an inch, the finished stitch will be half that length about 1/8 of an inch.

The most difficult areas to apply will be the corners. There are 4 outside corners and 2 inside corners.

Outside Corners

You will be applying the bias tape to the bonnets exterior to start with. 
Put a Running Stitch through the area of  bias tape that will be applied to the bonnets outside corner. Pull the thread taught and arrange the bias tape to the outside corner so that the fabric is smooth. Again, use the staggered back-stitch to sew the bias tape to the bonnet.


Inside Corner

You will start the inside corner by placing the bias binding along one side of the corner. Measure 1/2 an inch to the interior and 1/2 an inch from the bias edge. You should have a perfect 45 degree angle from the bonnets inside corner edge.


Stagger back-stitch back to your last completed outside corner.

Now make a 45 degree fold in the bias tape and line up the bias tape to the bonnets edge. Starting at the inside corner, made sure that there are no folds in the bias tape, start your staggered back-stitches and work onward to the next outside corner. 

Interior Bias Binding.


Once the exterior binding is finished , roll the bias tape over the bonnets edge and fold the bias tape leaving 1/2 of an inch bias tape on the interior side.

Pin and fold all the bias tape on the interior side. Smooth as you, go, create small pleats at outside corners, and make a 45 degree fold at the inside corners.

You will use a slip stitch to attach the bias binding on the interior.


That concludes the View A tutorial.

View A Part 2

Interior Layer


The interior layer of View A is a simple Brim with ruffle/lace trim.

You will need to cut 1 of each Brim and Crown. These are both cut on the bias. Once cut out, using your prefered method, mark the placement lines for the ruffle/lace trim. The pattern is marked for 1 inch trim. I have made my own trim using 1 inch strips of flocked poly organza. It has been given rolled hems on both raw edges and then gathered. This isn't necessary, you can use store bought trim.


Sew the trim down row by row, starting with the outmost row and working inward toward the crown/brim seam. The last piece of ruffled trim will actually be placed in the crown/brim seam.


Remove the excess trim to make the brims edges more apparent. 


Now, matching centers, seam the brim to crown.


As Exterior layer, notch and trim Brim/Crown seam.


Now matching center lines, apply internal layer to buckram form.


It's completely possible to apply the layers to buckram by hand. You can just use a whip stitch and puncture through from interior layer to exterior layer and whip your sewing thread around outside wired edge to puncture interior layer again. 

Also, if you are using a home machine, please use a heavy needle, and be careful at the brim/crown seam. There are 2 lines of wire at that point.

Next we will do the bias binding tutorial. 


Wednesday, November 20, 2013

View A Part 1

View A is a simple exterior, a simple interior with lace or ruffle decorations and a bias binding.


This example bonnet is covered 100% Kona Cotton and Flocked Poly Organza. 

External Layer

I cut a Brim and a Crown piece from both the Kona Cotton and the Flocked Organza. I used a technique known as "flat lining" to cover the external layer. Basically flat lining means to treat 2 layers of fabric as 1. 
Here is a great tutorial on doing flat lining:
http://thedreamstress.com/2013/10/tutorial-how-to-sew-flat-lining/

You will find though that because the bonnet is curved you will most likely need to pull out the outside stitches (stitches along the binding edge) that hold the 2 layers together, because they will tend to bubble. You will only know if you need to do this once you try to apply the fabric to the buckram form.


Once all is cut, seam the crown to brim between marks provided. Once seamed you need to notch and trim seam. Notch close to seam but don't cut threads, trim seam allowance to 1/4 of an inch. Press seam back toward crown. Use a tailors ham or sleeve board to make seam flat.


Obviously, make sure you mark your centers, both on the crown and the brim. Match up all centers to centers on buckram form. You can hand sew or machine sew along the outside edge to attach the external cover to the buckram form. You will be sewing through the buckram form. For some reason I didn't take a picture of this step. 

Next  blog post will be the internal layer and the binding.


Thursday, November 14, 2013

Mulling with Felt


You will need a small amount of fusable adhesive, such as Heat and Bond, Stitch Witchery or Steam a Seam, and a wire brush. This will be added to the cutting layout section of the pattern. Sorry guys! This is why we have a beta test after all! :)

The main thing to keep in mind about the mull layer, is that it's purpose is to smooth and soften the buckram form. Felt is obviously heavier than cotton flannel, so steps need to be taken so that the seam allowance doesn't cause a ridge of layered fabric.
I have come up with two solutions to this problem. You will be using both methods, one for internal, and one for external application.

When you go to cut out the brim and crown pieces cut off the seam allowances. You will need 2 of each piece. Because felt is not woven, you can place your pieces anywhere on your felt. You will also need to cut a half inch strip of felt about 13 inches long.


For the interior application, you can, if you choose, use a three-stage zig zag and a specialty foot with a center bar to join the crown to brim abutted. Abutted means edge to edge.


Or you can attach the brim and crown pieces separately to the buckram form (obviously matching centers) and whip stitch the crown to the brim. I choose to attach the brim to crown by hand as I feel like I have more control that way. I use a whip stitch to do this. My stitches are loose so that they do not create a ridge.


For exterior application you will attach the brim and crown pieces to the back room form separately. The pieces will leave a small gap where the brim and crown meet. Using your steam a seam or whatever fusible adhesive you are using, apply adhesive to the gap between crown and bream. Now apply that 13"x1/2" strip of felt. Using a wire brush, brush the felt strip so that its edges are blurred. Now you can pat, trim and brush at the felt strips until the transition between crown and brim is smooth.


<self back pat>
I've never seen anyone else mull a bonnet in this way, but to be honest, I think it's the smoothest and most seamless method I've ever seen.
</self back pat>


At this point you are ready to put your fashion layer on your bonnet. :) as a bonus I did a video of using steam to soften the buckrams glue to temperarily hold down the mull layer.


Wednesday, November 13, 2013

Mulling with cotton flannel

Before cutting into your pattern, you should make a few copies. Depending on the pattern peice your going to need different seam allowances.

Covering a buckram form is not as difficult as it would seem. If you take easy steps to ensure success, this project should not take long to complete. First of all you should have all of your materials ready. Don't prewash, unless you are allergic to sizing, it's not bad to leave the factory finish on materials for your bonnet. Also keep in mind that you cannot get your bonnet wet. Buckram is sized with glue. The glue is water soluble and will disintegrate when wet. So don't go out in the rain in your bonnet.     

The main reasoning behind prewashing your fabric in sewing projects, is to preshrink your material before you make it into a garment. This implies that you would actually wash on your bonnet which you're not going to do! So why go through the hassle of  prewashing your fabric?  What you should do however, is make sure all of your fabrics have been pressed with a good amount of steam. You're going to want to make sure that all of your grain lines are square so that you can find the bias.

You're going to cut 2 on the bias of both the brim and crown pieces. Using whatever is your favorite method of marking, mark the seam lines on both the brim and crown pieces. My favorite method is using pins and wax tailor chalk. I pin through my pattern and both layers of fabric and using my wax chalk I mark the seam allowance. You will also need to  mark the center line.


Once you have made all of your marks, match right side to wrong side. It doesn't matter if the crown is stacked on top of the brim, or the brim is on top of the crown. You need to however, match centre marks and pin running down the seam.

You are doing this strange seam consconstruction to reduce on seam bulk. The purpose of the mull layer is to smooth and soften the buckram form. You want to reduce as many bumps as possible. 


Using a three-stage  zig zag stitch, sew the crown and brim together. Do this to both the the exterior and interior layers. Once the seams are done, trim your seam allowances to as close as possible without cutting the sewing threads. Trim both the brim and crown seam allowances.


To apply the mull layer to the buckram form, you will be sewing through the buckram form and into the mull. You can either do this by machine or by hand. One trick I have learned though, to temporarily attach the mull to the buckram form, is to use a small amount of steam from your iron and soften the buckrams glue. This will stick down the mull long enough to be able to sew it in place.

Tuesday, November 12, 2013

Introduction to Reincarnation Clothing

Reincarnation clothing started as a small clothing line specialising in alternative fashion using upcycled recycled and vintage textiles. It was created for a venue called Artifact in Las Vegas. In the spring of 2013 we did a fashion show for Artifact on the UNLV campus. It was always the intention for Reincarnation Clothing to be more than just upcycled clothing. It was also meant for the term "reincarnation" to encompass not just the clothing but also the wearer. Lolita and alternative fashion transforms and reincarnates the wearer into all that is feminine, idyllic and innocent.

When I started Reincarnation Clothing I did it with a lot of help from my friend Heather Irete. I would like to thank her for all the hard work she put in with starting the Facebook page, the Tumblr, the Instagram and the beautiful logo. Heather is a very talented artist, and although she no longer designs for Reincarnation Clothing she is very much appreciated here. If you would like to visit her website or etsy here are the links, www.etsy.com/shop/AngelicThreadsEGL
www.heatherirete.com

A little bit about me. My name is Twila Taylor or TwilaTee, I am a professional seamstress, historical costumer, and I try my hand at cosplay from time to time. I make things. Lots and lots and lots and lots of things. You know I've even made a tent? Just I needed a tent, so I made one!. It's just in my nature to make things. I enjoy figuring out how things go together, its fun, like a puzzle.

When I was young my dad would tell me that you needed to be interested to be interesting. Meaning that the more things that you know how to do, the more worthy you are to know. And its true. The only things that we keep with us when we leave this life are our abilities and our experiences. It's been a life mission to encourage others to sew. What a fun transformative skill, to be able to make your own clothing. This leads us back to the term "reincarnation". How empowering! To be able to decide what changes you want to make, how you want to look, how you want to act, and to be able to enable that change in yourself for yourself. This is what Reincarnation Clothing is about.

I have decided to make a line of sewing patterns geared towards Lolita. Using my knowledge of historical millinery, my first pattern uses historical techniques to make a quality and beautiful bonnet. The "Dinah" is named after my mother, and is an Elegant, Gothic, Lolita half bonnet in 3 views. View A has a bias binding, a simple exterior brim and simple interior brim with lace and ruffled decoration. View B has a simple exterior brim, a shirring panel interior, and a ruffle along the outside edge. View C has a shirring panel exterior, a simple interior with ruffle and lace decoration, and piping along the outside edge.

I will be posting two tutorials on methods to mull your bonnet shortly. In the meantime, here are some definitions of terms we will be using, and some examples of shirred, or drawn bonnets. (we use shirred because it's the more modern term)

Buckram-  a stiff-finished heavily sized fabric of cotton or linen used for interlinings in garments, for stiffening in millinery, and in bookbinding. Buckram can be bought in 1 and 2 ply.

Mull- a fabric layer applied to a buckram form to pad and soften any harsh corners or imperfections the the buckram form. Usually cotton flannel, but any soft napped material will be sutable.

Bias- Bias grain is the thread line that is at a forty five degree angle to the lengthwise and crosswise grain of the fabric as it is on the bolt. 

Bias Binding Tape- a narrow strip of cloth cut on the bias, folded once or twice, and used chiefly for finishing and decorating clothing

Piping- Cord that is covered in fabric and used to decorate a seam

Millinery wire- sold invarious gages and wrapped in thread, millinery wire is used for providing shape and definition to a hat brim edge or crown, to reinforce wide brims, buckram forms, or to construct skeleton frames.

Buckram form- a basic hat pattern that is edged in millinery wire and has it's edges covered with bias binding. It is intened for covering in either fabric or straw.

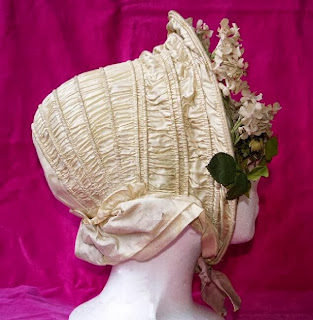
and here is some eye candy... pulled from pintrest... a bunch of shirred or drawn bonnets, one of them mine. It's always fun to see my work pop up on other peoples pintrests. I'm so glad people use the tutorials. :)


The last is my tutorial
http://twilatee.blogspot.ca/2011/06/regency-drawn-bonnet-pattern-and.html